
Ever since I read Dan Brown’s Angels and Demons book in the early 2000’s I have been interested by the the typographical puzzles that are ambigrams. After researching the topic I found that there are many different types of ambigrams out there. However, for this article we will focus on rotational ambigrams, the type that was featured in Dan Brown’s book and my personal favorite.
Rotational ambigrams are a type of ambigram where you can read a word when the image is right side up, but also when the word is flipped upside down. A simple example of this is the word ‘ipod!’ and ‘swims’ which reads the same when flipped.
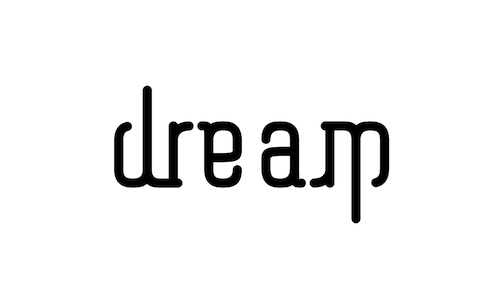
However, besides these two words there may be a handful of others that work, but what if you want an ambigram of your name or nay other word? In this tutorial we will cover the method that I use for creating ambigrams, focusing on an example of the word ‘dream’.
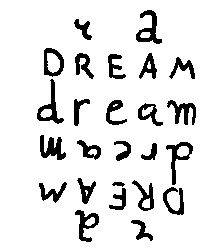
1. Write the word in every possible way
In order to make an ambigram we need to find any similarities between the two words. The easiest way of doing that is to start by writing down the word in both orientations and in every font type that we can find. It can help to study different case and font types to find ways of writing letters that you might not think of otherwise. The cursive script is often overlooked in this case. So for our example we get the following:
2. Get inspiration from Online Ambigram Generators
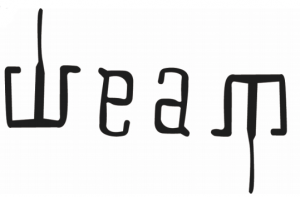
Once we are done with step 1, we can now start looking for patterns in the letters. Are there any clever ways of drawing a D as an M or an R as an A? In this step I always try to see what the ambigram generators suggest, so I put the word into our online ambigram generator to get some ideas. Below we see the suggestions given by our AmbimaticHD and Ambinit fonts.

3. Experiment with letter combinations
Personally I like the way the ‘e’ is done, but the other letters leave much to be desired. However, if you look closely to the first letter of the ambinit version, this is absolutely something that we can use, but instead of putting just the letter ‘d’ into the ‘m’, why not shift the location of the ‘d’ to the first leg of the ‘m’ and incorporate the ‘r’ into the third leg? So we go back to the paper and start experimenting.

4. Finish the word and match the style
We found a few solutions where ‘dr’ looks like an upside down ‘m’. Now we pick one that fits best with the theme that we want. Be careful here, as this will dictate the style of the rest of the ambigram.
The next step is to find a good solution for the remaining two letters. Fortunately, ‘e’ and ‘a’ are very much alike when flipped, so this will not be too hard. The biggest challenge now will be to follow the style.

5. Combine the word
You probably already tried this, but in this step we will combine the two ambigram pairs of ‘dr/m’ and ‘e/a’ into the complete word. This is also the point to evaluate the solution and see if you are happy with how it looks.
Make sure to keep a persistent size and spacing during this step. A good way to do this is to draw out half the word and then trace it both rightside up and upside down. This guarantees that you will have a better symmetry in the final product.
6. Vectorize the ambigram (Optional)
We managed to make an ambigram, that is a great achievement! If you are making ambigrams for fun then you are probably done at step 5, but if you are trying to make a logo or something public then it will need some more work.
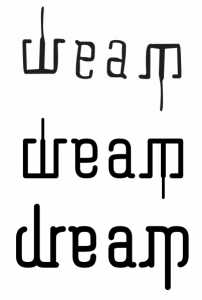
The best way to achieve this is by tracing the ambigram with a vector tool like photoshop, illustrator or even just PowerPoint. You’ll have much more control over the lines and curves this way. Plus you only need to make half of the ambigram, and then you can copy the other half with a 180 degree rotation. Below we see the original and two improved versions. See our full tutorial on vectoring here.
7. Share your ambigram and get feedback! (Optional)
Once you are done with your ambigram, be it at step 5 or 6, it is always a good idea to share it and get feedback. Sometimes small changes can make it look much better, or others will have completely different solutions for the same word. You’ll learn a lot from both, so why not get out there? Personally I like the /r/ambigrams reddit board, but there are many other communities out there!
This is how I make ambigrams, and it works out for most words that I try. Of course, like with all other art forms you will need a lot of practise. Try to start with easy words and study other ambigrams for inspiration on how to solve certain letter combinations.